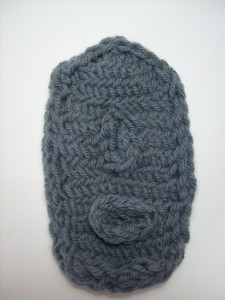
Ah, Miniature Herringbone Stitch, the super dense knit fabric that looks woven. My Herringbone skirt was made in it. I played a lot with it in swatches, here are my findings and opinions about using it for more than just pot holders.
90 Degree Flip
My first design decision was to flip the swatch 90 degrees so that I’d get vertical stripes. I love horizontal stripes as much as anyone else on polo shirts but I wanted my garment reminiscent of fine suiting. That meant investigating side to side construction methods, and flipping the functions of my shaping techniques; the selvages would be near my hem and neck; I’d use short rows for waist and wrist increases; stitch increases and decreases for bust darts and shoulder shaping.
I have not found the 90 degree flip to cause any gravity distortions in a finished object, those twice worked stitches don’t droop. There is more stretch between the rows than there is in a single course of stitches, so the 90 degree flip actually puts the greatest give around the body where it needs it most.
Choosing Yarn and needles
MHB uses 25% more yarn per square inch of fabric than stockinette. I think most of that yardage goes into the extra thickness. You want to use the yarn weight about two weights smaller than usual, and the needles about four weights larger than you would use for that yarn. For example: if the fabric weight you are aiming at is worsted, start your swatch trials with sport weight yarn, but use whatever needle you would use for Aran yarn. If you want a fabric of a dk yarn, use a fingering yarn, and whatever needle size you would use for worsted yarn.
I’m particularly fond of tweeds in MHB. Barbara G Walker recommends using two yarns of a close shade, like “cream with fawn, rose with pink.” I’m not sure is she meant two yarns held together, or a different color every other row. Two yarns held together makes for a very, very thick fabric indeed, and the effect is a lot like a tweed. I have tried alternating colors with rows, but the effect doesn’t grab me.
Cast On/Cast Off Considerations
I usually start with a provisional cast on, work a row of purls across the back, then start in on the MHB. If I begin an MHB row immediately, it is too tight to knit, and the reverse loops are too tight to graft or knit later.
Another method for starting off is to work 3 or 4 rows of stockinette increasing twice every 5 stitches to the MHB. These stitches can be folded down and hemmed later, or you can pick up stitches between them and the MHB, or put a seam there. I like a purl ridge for turning. The piece can be finished in the same way, decreasing at a ratio of 2 stitches in 7 to keep from lettuce ruffles on the hem.
When I bind off in MHB, the tightly twisted stitches flare out. To counter this, K2tog every second then third stitches as you bind off. An I-cord cast off at a ratio of one round I-cord for every two stitches knit together is my favorite method, matching an I-cord selvage.
I don’t usually pick up stitches from an I-cord for an I-cord cast on, I work an I-cord cast off on the provisional cast on. If I have made an I-cord selvage, I turn the corner with 3 rounds of I-cord not attached to anything, then graft it to the provisionally cast on beginning of the I-cord selvage. If you plan to graft the area, just put the stitches on a holder, if you leave a tail 3 times the length of the edge, you can use it for the grafting and save yourself another end to weave in.
But what about garment shaping; and how to navigate it with markers? More on all that in the next post.

