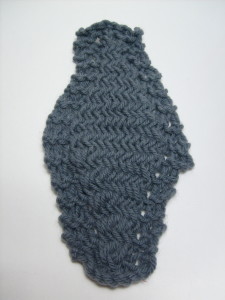
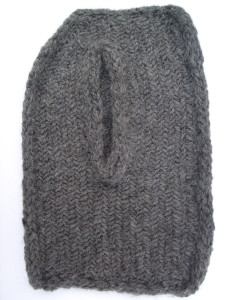
Miniature Herringbone Stitch, a super thick, cool, underused stitch, has some quirks when you are designing with it. It helps to choose your needles, and think about your cast on and bind off a bit differently.
But I loved how my Herringbone Skirt came out when I made it in MHB.
Markers
Since all the stitches are worked twice, and loop stitch marker risk becoming a permanent part of the fabric. The removable hook kind of marker might work better, or a safety pin moved up from time to time, though I find the zig zag stitches hard to follow.
I’m the sort to “read” the knitting more than to use markers anyway, but in this case, I think it’s a good idea for everyone: count the loops on the needle to count stitches, and count the rows on the reverse side, each ridge is one row.
But, it’s always interesting to hear how other people solve the same problem! Do comment, please.
(I love comments.)
Increases
To increase in Miniature Herringbone Stitch (MHB) on knit side or first round of a circular piece, Insert the needle into three stitches through the back loops, draw up a stitch, do not remove any stitches from your left needle. Insert the needle into the next two stitches through the back loops, draw up a stitch.
To increase on the purl side, Insert the needle purl wise into three stitches through the front loops, draw up a stitch, do not remove any stitches from your left needle. Insert the needle purl wise into the next two stitches through the front loops, draw up a stitch. On the second round of a circular piece, make your increases in the same fashion, only through the front loops.
If you are using a garter selvage, you can increase or decrease in the selvage, then start your MHB sooner or later by the number of stitches you have changed in the selvage. This is the tidiest method (unless you are increasing more than two stitches) but you don’t always want your shaping on the edge of your piece.
Decreases
To decrease in MHB, work three stitches, push two off the needle at once, or decrease in the selvage and exchange some MHB stitches for selvage ones.
Short Row
Each stitch in MHB is tightly connected to the one before and after it by the way it is formed so it is not necessary to wrap rows when you short row. But, turning at one stitch does pucker the fabric since each row is much taller than any one stitch is wide. For smooth short rows, skip at least the first two stitches of the the return row with yarn in back, leaving a float.
As with color stranded knitting, floats can’t get too long or they will catch on things; but these floats are vertical ones, and less likely to snag fingers or buttons. Depending on where the floats occur on the body, I’m comfortable with them growing as long as 2-3 inches.
When you are growing back your short rows, stagger them, so your turns are not on top of each other. For instance, if you have started a balanced dart short rowing in 8 stitch steps, when you add in the other side of the dart, go 12 stitches back on the first row, then slip 8 and make all of your return steps 8 stitches. Your last short row will be only 4 stitches long, but you will never have a bumpy pile up. The row beginning with slipped stitches can be awkward to tension neatly. It helps if you spread out the slipped stitches smoothly before you judge how much yarn to leave in your float, and for that first stitch where the yarn is heading in the wrong direction behind your work, pinch it with a spare finger to give yourself something to grab. The tension behaves itself after that first stitch.
The Next instalment will cover buttonholes, grafting and design considerations.


