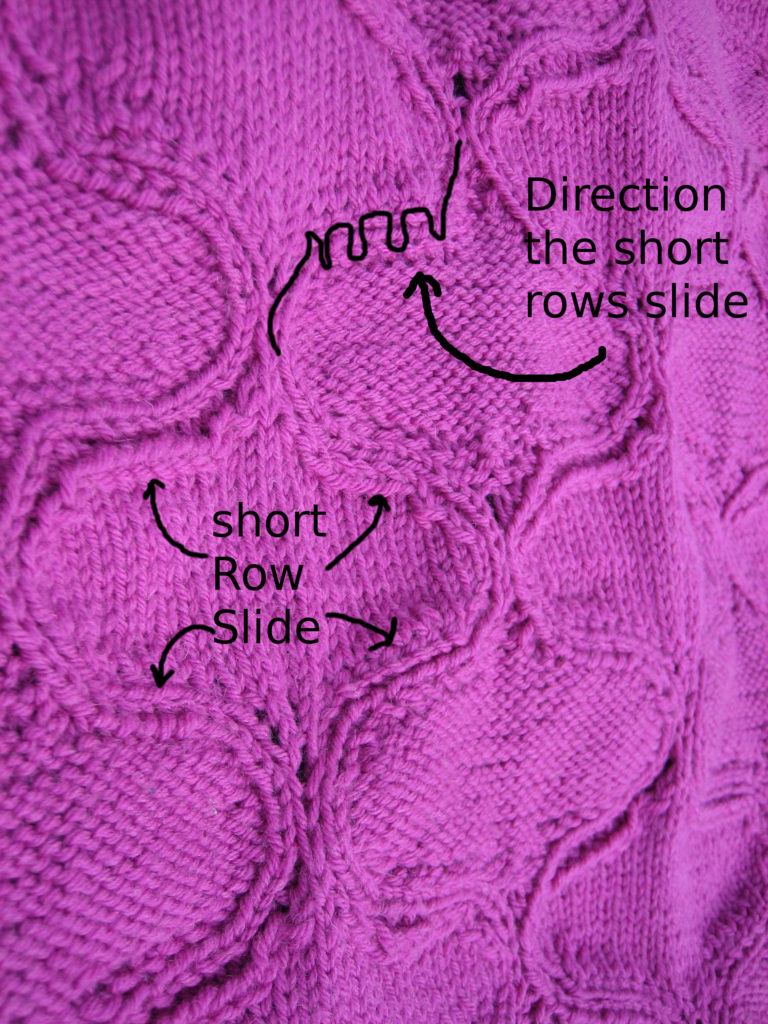
I will be releasing two patterns soon; one of my short row slides blankets is in test knitting, the other is at the Tech Editor’s, I’m hoping to spring them on the world before the GAL (Squeal! GAL is coming!) So, I’d better get that intuitive explanation Corina called for posted here, sequential descriptions are already in the pattern, both in chart and written form. Stay tuned for another announcement on November 18th too.

A Short Row Slide (SRS) looks as if a column of ribbing is sliding horizontally (well, close to horizontally). It’s made by many micro short rows adding stitches to one side, and decreasing them on the other. To slide right, you decrease on the right side of the ribbing, and increase on the left, over and over again. To slide left, you increase to the right of the ribbing, and decrease to the left, over and over again. I didn’t want to use a wrap and turn, because in a blanket, there is no wrong side to hide the wraps on, so I slipped the turning stitch with the yarn in front of the purl side on most turns.
Can you choose different increases, decreases and wrapping methods and still have a sliding rib? Probably – let me know what you come up with.
I developed the SRS to look like a border between “tiles,” of different knit grounds: garter, 1,1 rib, Stockinette, and reverse stockinette. I decided that I wanted the decreases to echo the border for stockinette (whichever side was knitted) for garter I wanted it to keep the knobby garter look on both sides of the fabric, and for ribbing, I wanted it to look as if the tile had been painted in stripes, then punched out. For increases, I wanted to continue that inner line of border with lifted increases on the knit side of stockinette, bumps on both sides for garter, and again, that painted then punched out look for the ribbing.
The abbreviation code works like this:

a. L or R for left or right leaning slide for the bordering rib between the ogees as it rises
through the fabric.
b. In this part of the abbreviation, the field of fabric is listed as you come to them in your knitting. This is where knitting and English confuse each other; in the code the fields are listed left to right, but you come to them in your knitting from right to left. I read them out loud to myself, then follow that order on my needles when I’m proofing my pattern, when I’m knitting, I just read the stitches. The types of fabric fields you will encounter
are:
- g for garter
- P for reverse stockinette field
- K for stockinette field
- kpk for K1, p1, k1 ribbing
- pkp for P1, k1, p1 ribbing
c. the number of stitches that are sliding horizontally.
My plan is to blog each field over the next few days, with their own swatches, charts and row instructions, so that the intuitive parts are made plain, I get lots of pretty photos, and no blog post gets too long.
My Patterns Andalus and Habibi use these techniques.
